New Seasons Coastal Kale Salad

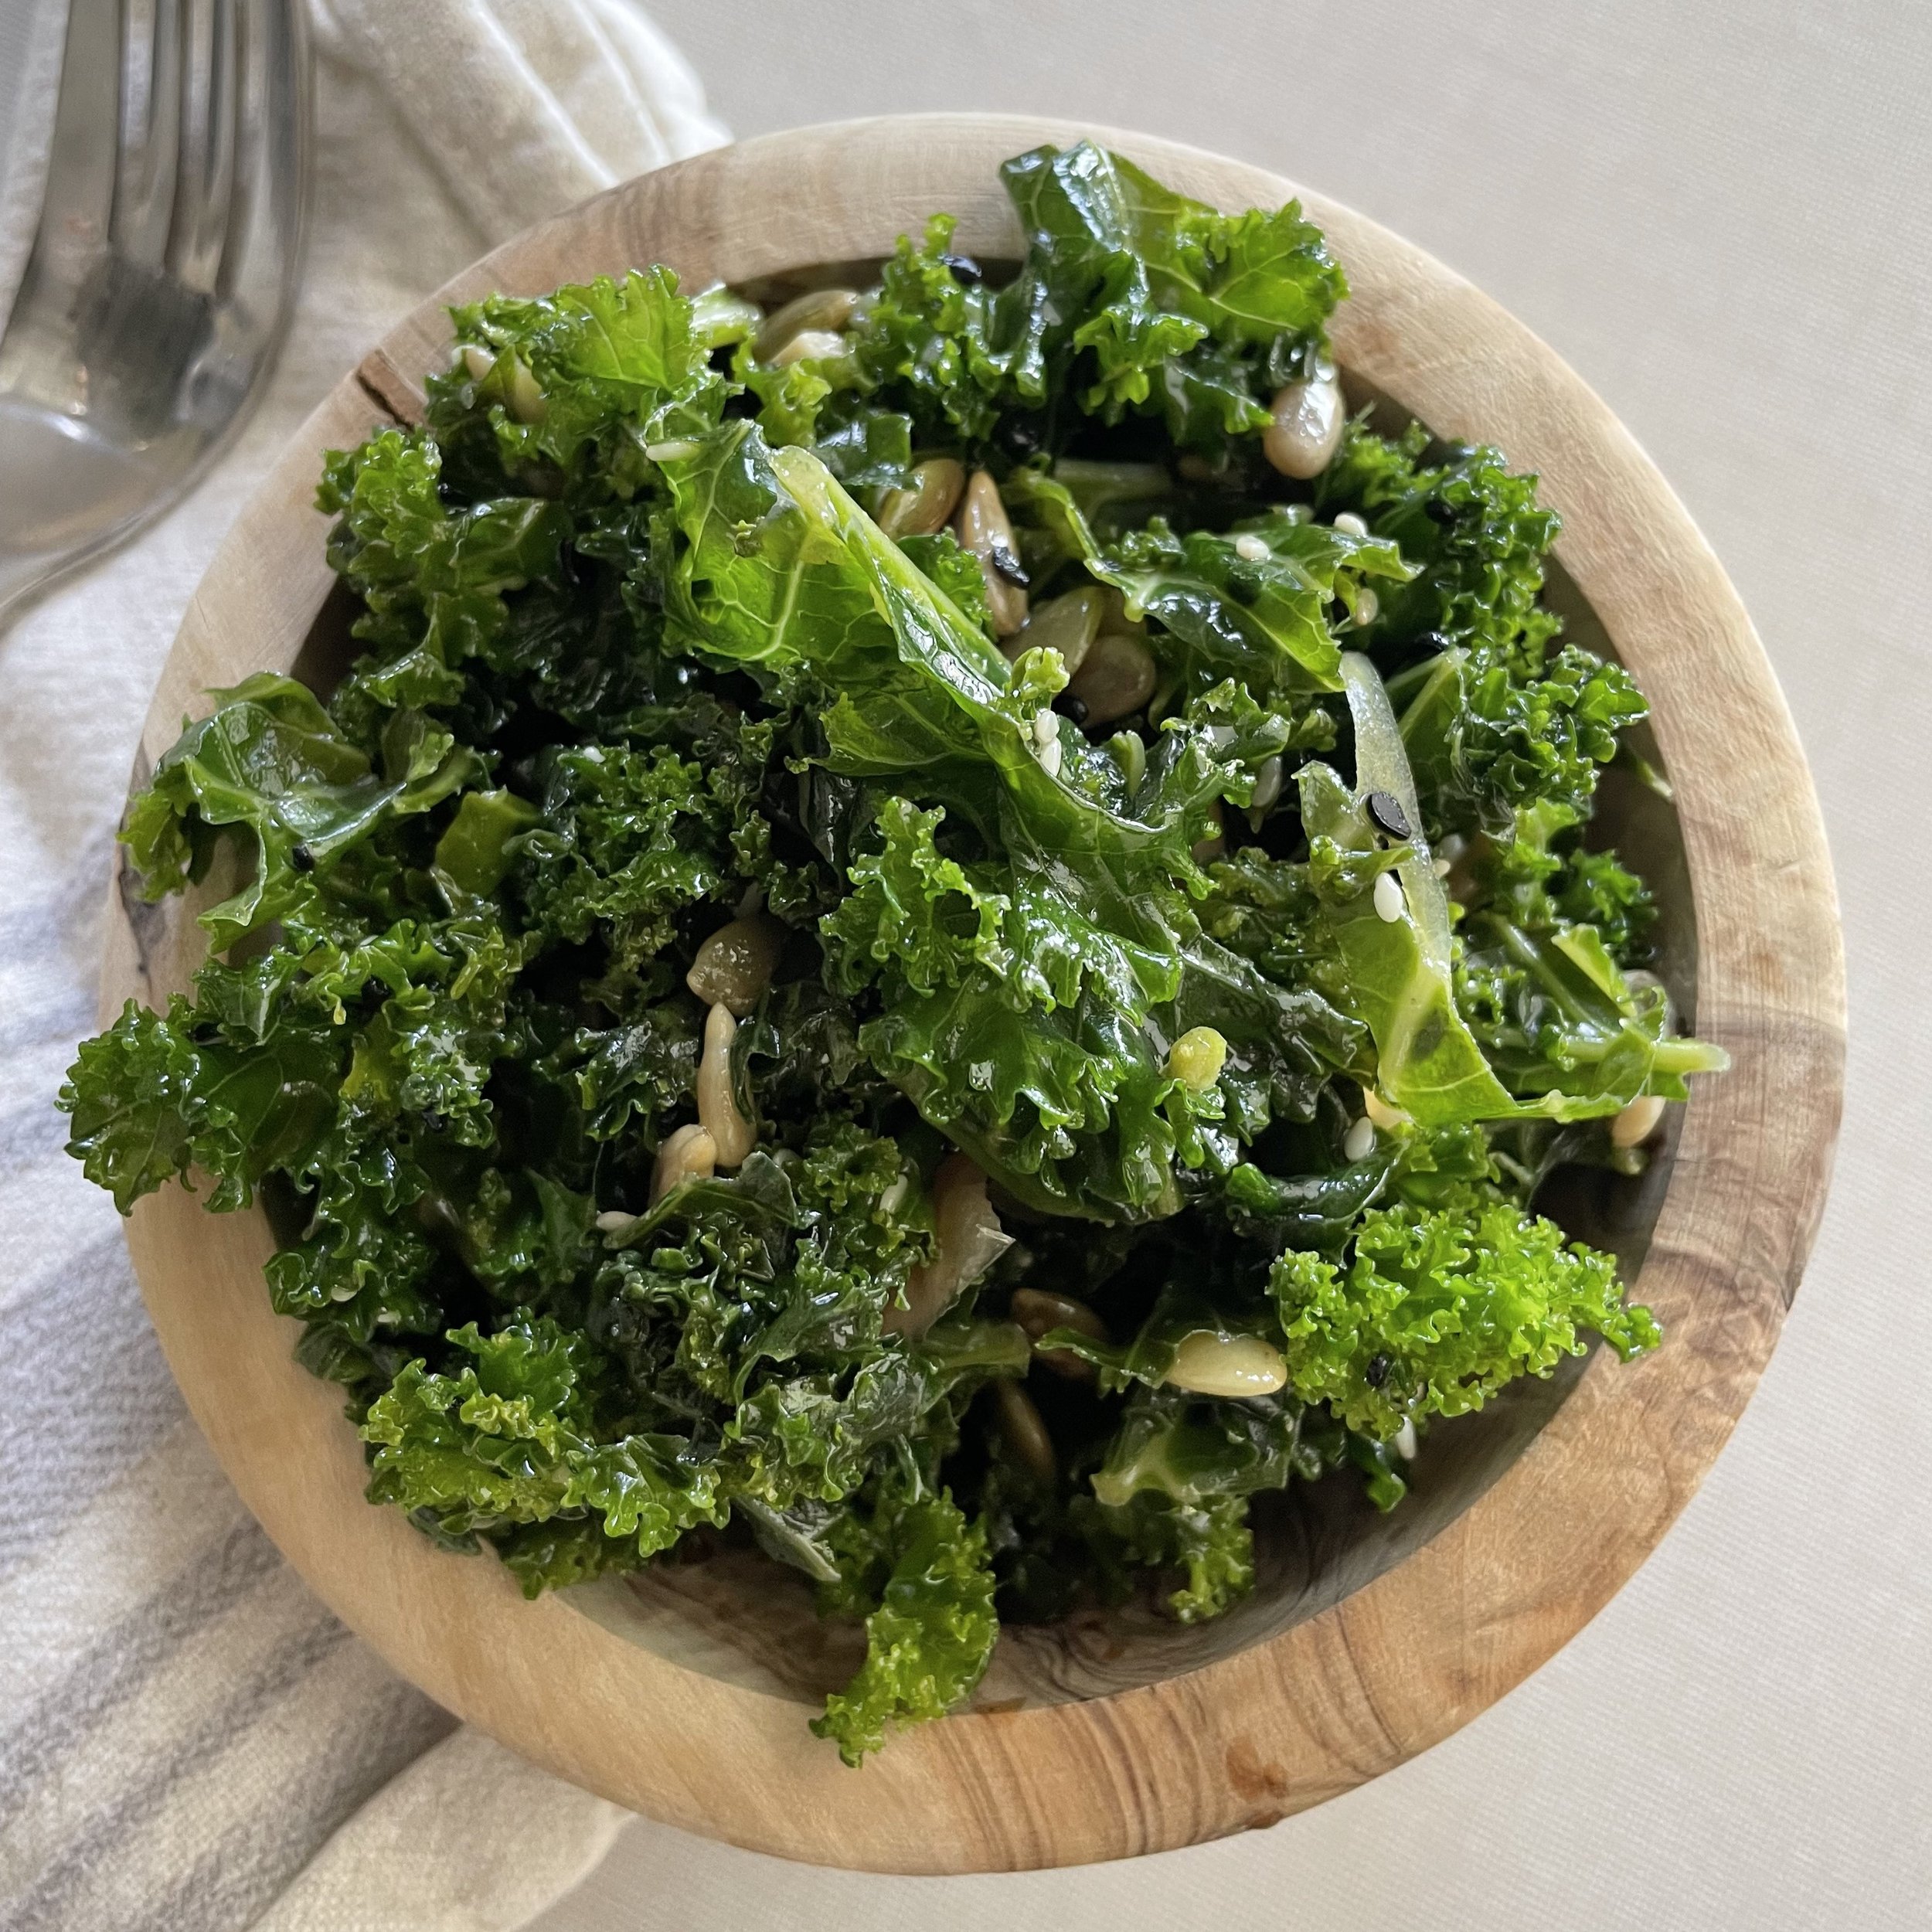
New Seasons Market in Portland has this amazing, simple kale salad in their prepared foods section that is a flavor explosion in every bite. Since I am not a huge fan of canola oil and try not to consume it often, I figured that I should recreate this salad at home. I enjoy it all throughout the year but it is especially nice in the summer months. It tastes amazing right away, but can also spend a day or two in the refrigerator if you want to prep it ahead of time. I love it as a side or a main with a protein added.

Serves 2-4

Ingredients:

  • 1 bunch of curly kale, washed and chopped finely

  • 1/2 large red or sweet yellow onion, sliced thinly

  • Juice of 1 lemon

  • 3 tablespoons of Coconut Aminos or Bragg’s Liquid Aminos (if soy is tolerated or preferred)

  • 1/3 cup extra virgin olive oil

  • 1 teaspoon garlic powder

  • 3 tablespoons sesame seeds

  • 3 tablespoons sunflower seeds

  • 3 tablespoons pumpkin seeds

  • Freshly grated parmesan to taste

  • Salt and pepper to taste


Directions:

  1. Whisk the garlic powder, lemon juice, coconut aminos, or Bragg’s aminos + extra virgin olive oil together

  2. Place the kale, onion, and seeds into a large salad bowl. Add the whisked dressing to the salad and gently mix. You will want the kale to be pretty coated so the seeds will stay dispersed throughout the greens

  3. Grate the fresh parmesan, salt, and pepper to taste and gently mix again.

  4. Enjoy!


Fruity Gelatin Gummies

These are a family favorite and a kid-approved healthy snack in my house. When I am not making Elderberry Gummies, this recipe is my go-to for a gut-supportive, nutrient-dense snack. I also love that it takes maybe 5-10 minutes to prep. I love incorporating gelatin into my family’s diet this way. Gelatin is a protein product derived from collagen and besides being super nourishing for the digestive tract, there is evidence that it plays role in joint health and brain function, and may improve the appearance of skin and hair. It is flavorless and colorless and when it dissolves in warm water and takes on a jelly-like texture as it cools.

Makes about 18 gummies

Ingredients:

  • 8 Ounces organic unsweetened 100% fruit juice (I like the Santa Cruz, Lakewood, and RW Knudson brands)*

  • Options: I like to mix it up and even mix juices within the gummy, 4 ounces each, my favorites include pineapple, pomegranate, tart cherry, blueberry, and orange

  • 1/4 cup grass-fed gelatin (I like Great Lakes, Further Foods, and Perfect Supplements)

  • 1 tbsp raw honey (optional)


Directions:

  1. Combine syrup, juice, and gelatin in a medium saucepan.

  2. Heat to medium and stir well until gelatin is completely combined.

  3. Add echinacea drops and honey if included and stir again.

  4. Remove from heat and pour the mixture into silicone molds or a square baking dish.

  5. Refrigerate for 30 minutes or until set.

  6. Pop them out of the molds or cut them into square inch pieces.

  7. Store in refrigerator for up to 10 days.

Enjoy!!!!

*Juices to try for different flavors and their benefits:

  • Orange juice - high in vitamin c, supportive of adrenals (stress) and immunity

  • Pineapple or papaya - contains enzymes that are digestion and inflammation supportive

  • Tart cherry - supportive of melatonin production/sleep and inflammation

  • Pomegranate - high antioxidant content support brain health, inflammation, and sleep


AHB Adrenal Cocktail

If you experience moderate to high stress in your daily life (this is most of us, right?!), then this adrenal cocktail may be just what you need to replenish the nutrients your body is using up quickly during these stressful times and provide you stable and balanced energy.

Drinking an adrenal cocktail is a really simple and easy way to nourish the adrenal glands and keep your minerals balanced. In times of stress - work stress, life stress, new baby, family life, etc., I recommend drinking an adrenal cocktail daily in the mid-afternoon (around 3:00 pm) when you typically feel an energy crash. If you typically feel your energy crash in the morning, drinking it between breakfast and lunch may be a better time for you. There are no real rules! This drink is also amazing for postpartum mamas. This is a great time to nourish your body and focus on your adrenals as your stress is high and you are definitely not getting the rest and sleep you need.

What are adrenals and what do they do?

Our adrenal glands are small glands that sit on top of the kidneys. Their main role is to produce and secrete certain hormones including cortisol which is responsible for and supports our metabolism and stress response, adrenaline which also helps your body to react to stress, and aldosterone which helps maintain our water/salt balance helping to control blood pressure.

How AND why you should support your adrenals

Given the many stressors we’re exposed to daily, our adrenal glands are workhorses and use up a lot of nutrients when trying to regulate our stress. The main nutrients that our adrenal gland utilizes include potassium, sodium, and vitamin C.

There are many ways to support your adrenals like eating balanced meals and eating regularly, getting enough rest and sleep, and sticking with lower stress exercises like walking, yoga, and pilates. The adrenal cocktail is a nice complement to these strategies and is a great way to help replenish the lost nutrients and support your adrenals quickly.

Here is the basic formula and how you can swap in some other ingredients that you may prefer or just happen to have on hand. I love this recipe because it contains the replenishing whole-food nutrients and electrolytes needed to support the adrenals along with protein and fat to help blood sugar balance.

  • Vitamin C - 100%, (fresh-squeezed if possible)orange juice or any other citrus fruit, tart cherry juice is a nice option too

  • Potassium - coconut water, pure aloe vera juice, water with a pinch of cream of tartar all work

  • Sodium - sea salt, pink salt, Celtic salt

  • Protein - grass-fed collagen peptides or your favorite protein powder (optional)

  • Fat - coconut milk from a can, coconut cream, heavy cream

Prep time: less than 5 minutes

Yield: 1 serving

Ingredients:

  • 4 Ounces orange juice (Trader Joe’s makes a great fresh-squeezed option in the refrigerated section)

  • 4 Ounces plain coconut water

  • 2 Tablespoons canned, unsweetened coconut milk or coconut cream

  • 1 Serving /scoop of grass-fed collagen peptides or protein powder of choice

  • 1/4 Teaspoon high-quality sea salt ( I love Real Salt)

Directions:

  1. Blend all ingredients together in a blender or froth with a handheld frother and enjoy!


Summer Smoothie

This smoothie is inspired by the beautiful peaches that are in abundance this time of year! This smoothie serves one, but feel free to double or triple the batch if you are feeding others too.

Ingredients:

  • 1 cup unsweetened milk of choice

  • 1/2 frozen banana

  • 1 frozen peach (I cut up a batch into cubes and freeze it overnight)

  • 1 cup kale, baby kale, or baby spinach

  • 1 tbsp organic ground flax or chia seeds

  • 1 tbsp hemp seeds

  • 1 serving protein powder (see my recs here)

  • 1 teaspoon vanilla extract (optional)

  • Pinch of sea salt


Directions:

Blend all ingredients with one cup of ice. Garnish with coconut flakes, cinnamon or cacao nibs if you are feeling fancy!

Check out my AHB smoothie formula here for other ideas and inspiration for creating your own balanced smoothie.

Festive Cranberry Nettles Tonic

This tonic is fantastic all year long but is an especially nice non-alcoholic drink to nourish yourself with around the holidays. Nettles stimulate our lymph, are supportive of immunity and detoxification, our adrenals, help with digestion, allergies, and much more. They are loaded with minerals like potassium, B vitamins, and vitamin K1. They can also help the body assimilate magnesium better. If you tend to be sensitive, start with a shorter steep time, 2-4 hours, and start with 1 cup a day to see how your body responds. Feel free to work up to 2-3 cups a day if you’d like. For maximum benefits steep overnight.

Ingredients:

  • 1/2 cup organic dried nettle leaf (I like to get my herbs from MRH)

  • 1 tablespoon organic dried spearmint or peppermint leaf

  • 1/2 Cup unsweetened organic cranberry juice

  • 2 teaspoons honey or maple syrup

  • 2 cups boiled water


Directions:

  1. Boil the water.

  2. Place the nettle and mint into a quart-sized mason jar and add the boiling water over the herbs. Stir to combine, put on the lid, and allow to steep for at least two hours and up to overnight.

  3. Strain the herbs, rinse out the jar, and pour the strained liquid back into the jar. Add the cranberry juice, sweetener, and enough filtered water to fill the jar. Drink up to two cups a day. Enjoy warm, cold, or at room temperature! Feel free to garnish with some fresh, festive herbs.


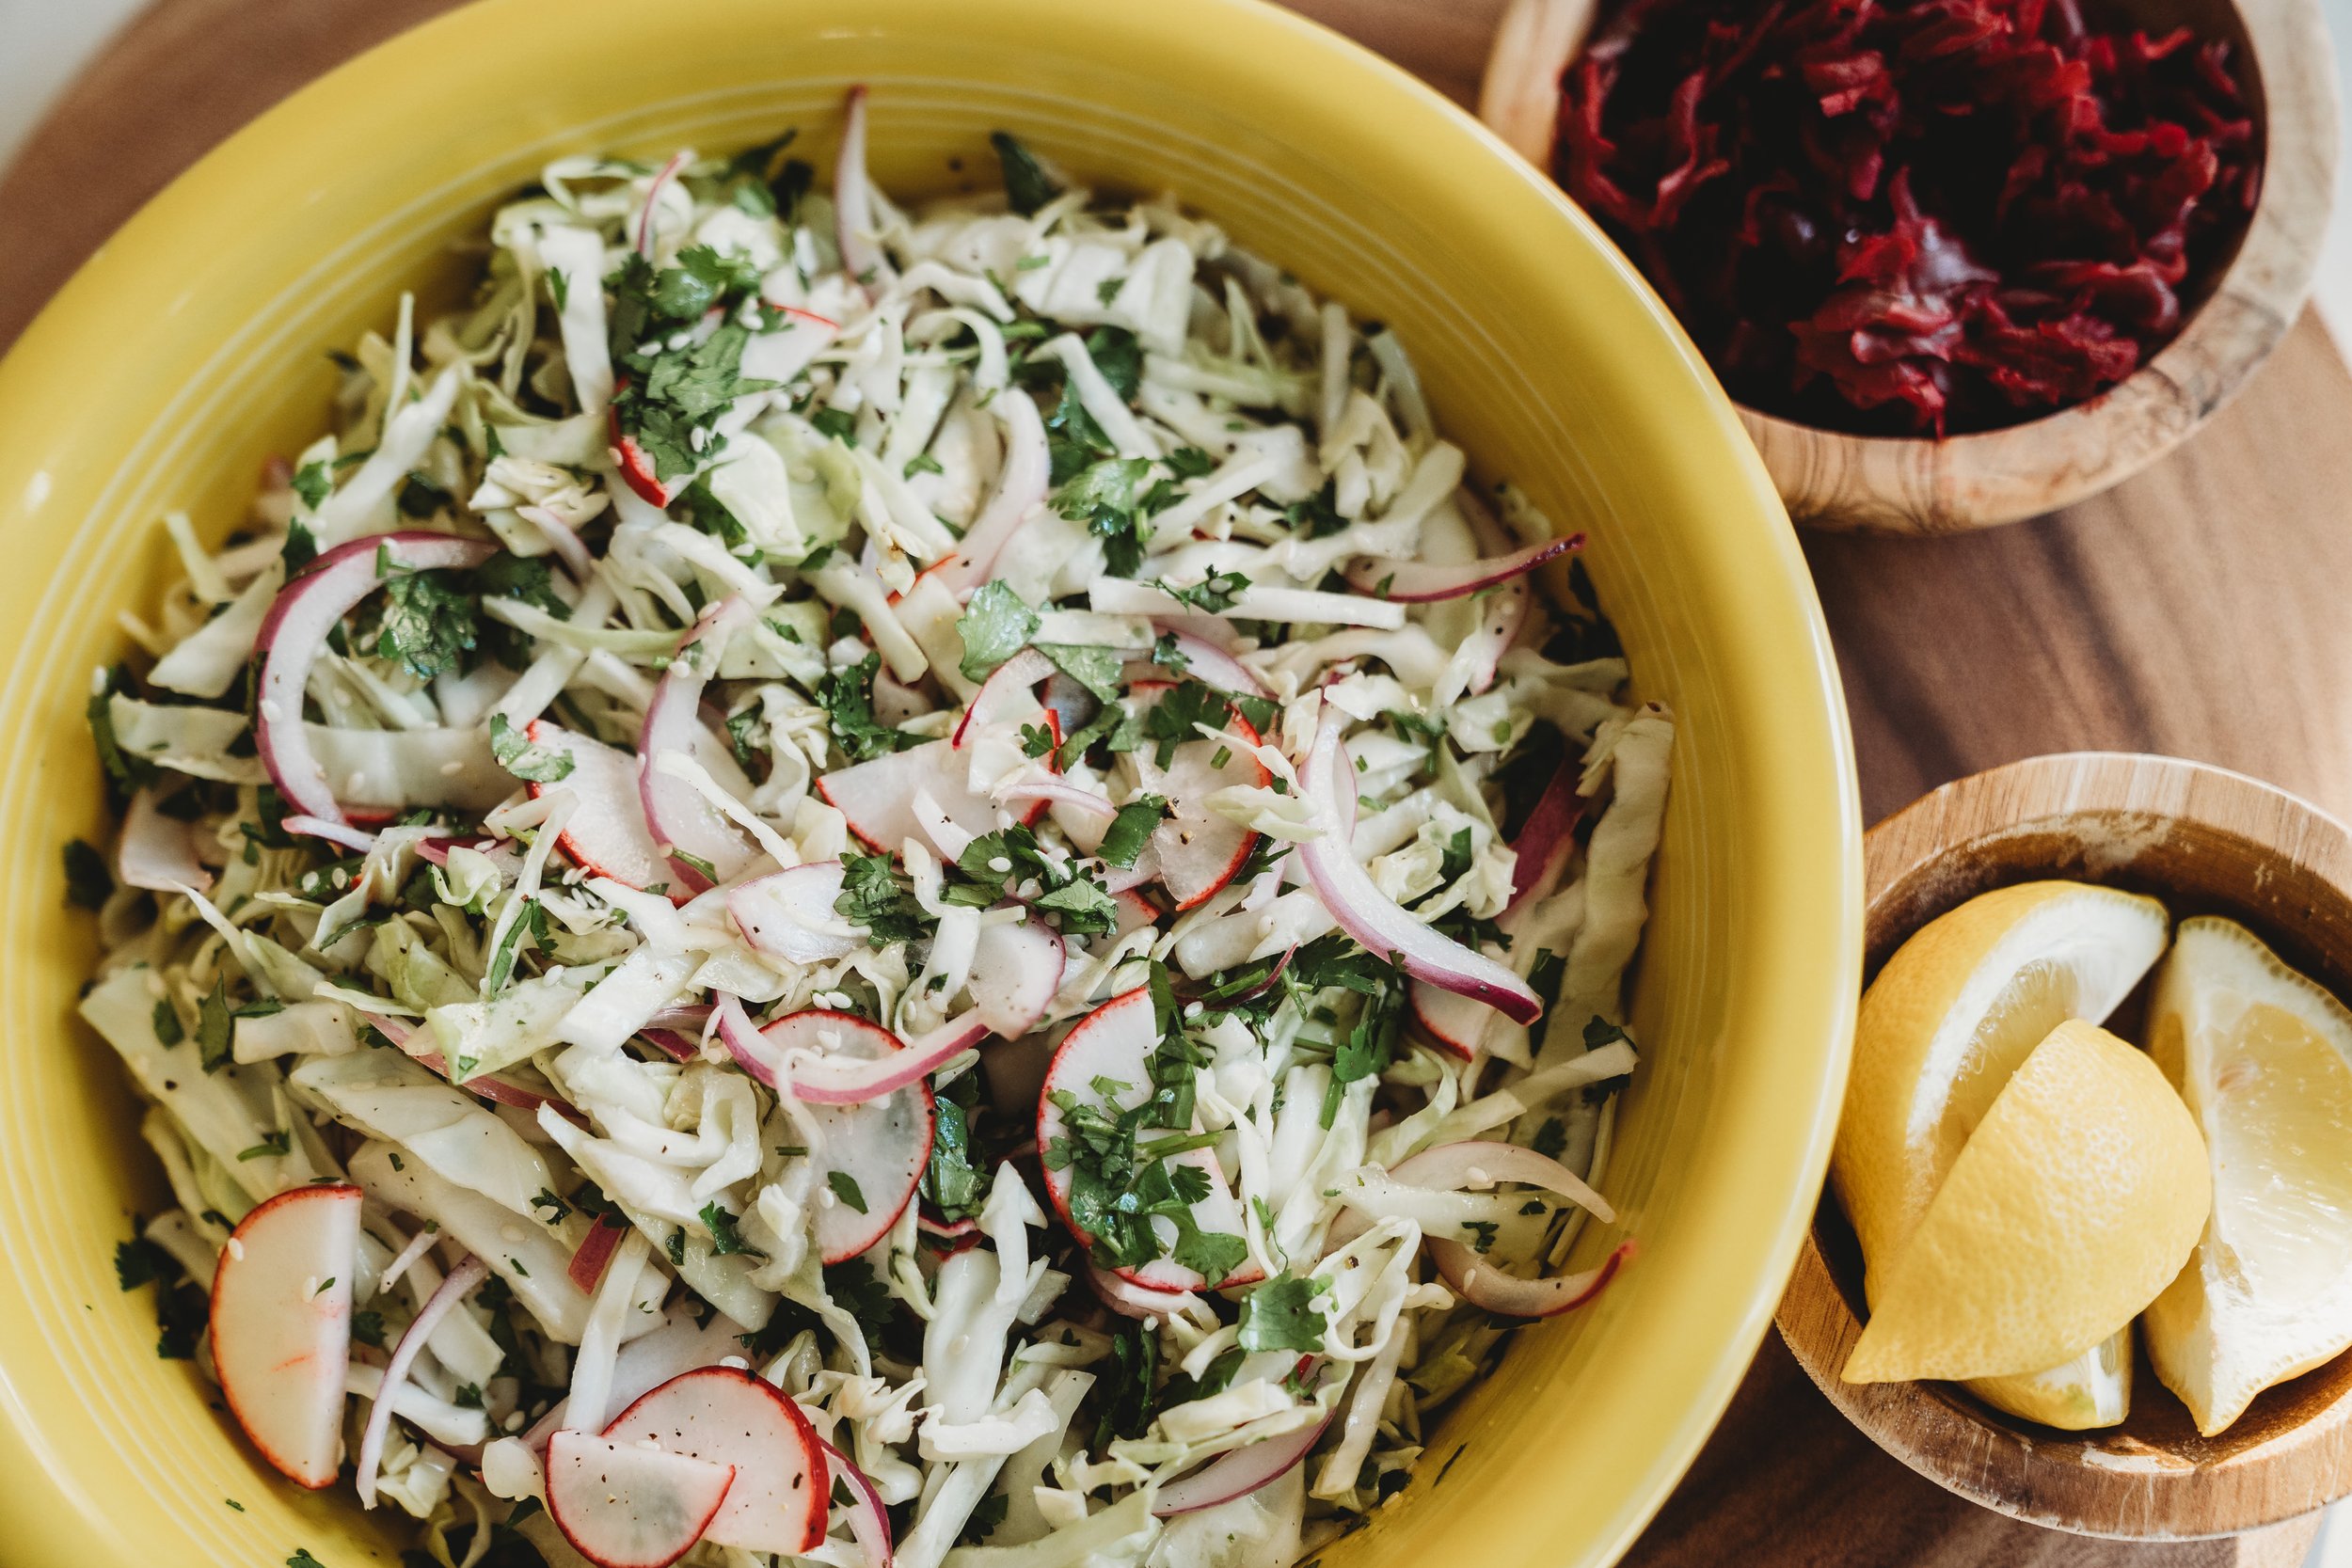
Versatile Cabbage Slaw

I LOVE making a cabbage-based slaw as a side all year round because you can always find in-season ingredients and it can basically go along with any recipe. Cabbage is loaded with nutrients including vitamin C and folate, fiber and is supportive of liver and gut health. I make a big batch of this at least once a week to eat as a side or garnish. Here is my go-to recipe. I swap out ingredients depending on what I have on hand. ⁠

Prep time: 20ish minutes

Yield: 8-10 servings


Ingredients:

  • Red, green, napa or savoy cabbage, chopped - 6-8 cups⁠

  • Bunch of cilantro, chopped fine - more if you like cilantro⁠!

  • 1/2 - 1 red onion, sliced thinly (depends on how much onion you like!)

  • Bunch of red radishes or large daikon, thinly sliced into half-moons⁠

  • Sesame seeds or pumpkin seeds- as many as you'd like for color, interest, and flavor⁠

  • Apple cider vinegar, a splash

  • Juice of 2 limes or lemons⁠

  • Extra-virgin olive oil or Avocado oil, a few glugs, or about 1/4 cup⁠

  • Sea salt and pepper to taste⁠

Cabbage slaw in a yellow bowl

Directions:

Combine all veggies in a large bowl, add spices and liquids, combine, taste, and refine as needed.⁠⁠

Other potential additions or swaps:

  • Sliced or shredded carrots

  • Chopped celery

  • Thinly sliced cucumbers

  • Chopped nuts

  • Seeds⁠

  • Chopped dried fruits⁠

  • Chopped apple

  • Chopped pear

  • Chopped or grated garlic⁠

  • Thinly sliced green onion⁠

  • Different spices⁠

  • Different kinds of vinegar

Any other ideas? Let me know!

Slippery Elm Tea

Slippery elm bark is an herb that was originally used by Native Americans to treat symptoms associated with gastrointestinal upset, cough, and sore throats.

  1. Fill a teapot with 12 oz. water and bring the water to a boil.

  2. Add 2 tbsp. slippery elm bark powder to the mug.

  3. Pour the boiling water into the mug. Allow the slippery elm bark to steep in the water for three minutes.

  4. Stir the tea with a spoon for one minute, then allow the slippery elm bark to steep for another minute before drinking

tea.jpg

Nutrient Dense Sprouts

With being home a lot more during this pandemic, I’ve been experimenting in the kitchen a lot more too. I didn’t jump on the sourdough train, it seemed so daunting! But I did jump on the sprouting train. One of my favorite ways to get in nutrient dense foods is in the form of sprouts. They are colorful, tasty and add texture and something extra to every meal. They are not super cheap at the farmers market or grocery store so I’ve been experimenting with making my own at home. Not only are they cheap to make, they are EASY and take very little prep or time once you get the proper tools. They are a great garnish to any meal, especially soups and salads. First things first:

What are sprouts?

When water is added to a seed, nut, bean or grain, it germinates and begins to grow, creating a sprout. The seeds transform from a dry, hard ball into a nutrient dense, bio-available bundle of vitamins, minerals, and proteins that are easier for the body to digest, and contain many beneficial enzymes. I talk about this in more detail in this post.

What are the benefits to consuming them?

Different sprouts have different benefits, but let’s focus on broccoli sprouts because they are the best of the best when it comes to nutrient density and the benefits they bring to the body given that it contains the highest amount of Sulforaphane. One of the healthiest edible substances on the planet, Sulforaphane is an isothiocyanate (ITCs), a chemical compound found in all cruciferous vegetables including cabbage, cauliflower, broccoli and kale but it is found in much higher quantities in the sprouts. Depending on the study, broccoli sprouts can contain as much as 17 to 30 times more sulforaphane than broccoli. Don’t get me wrong, you should still eat broccoli too, it has many benefits, but the sprouts contain more of the sulforaphane goodness. Blending, chopping, or chewing the sprouts activates an enzyme that creates the conversion to sulforaphane in the sprouts. In addition to ITCs, depending on the type of sprout you consume, they contain high amounts of beta carotene, omega-3 fatty acids, protein, vitamin C, Folate, Iron, Vitamin K, and Fiber. Sprouting increases protein by as much as 20% and these other vitamins by up to 500%!!!! Sprouting also reduces the phytic acid and lectins in beans and grains that can make them hard to digest. Sprouts are truly a superfood.

The benefits to consuming them include but are not limited to:

  • Protection against certain cancers (including but not limited to: colon, prostate, breast, skin, lung, stomach)

  • Heart supportive properties

  • Protection against neurodegenerative disease and DNA damage

  • Supportive of hormone metabolism

  • Increases glutathione production (an antioxidant produced by the liver that helps neutralize free radicals and reduce oxidative stress that can damage the body's cells)

  • Anti-inflammatory

  • Detoxification of carcinogens

  • Anti-estrogenic properties

  • Other types of sprouts such as lentil, alfalfa, radish, mustard (and more!) are wonderful to experiment with too and are also quite nutrient dense.

Sprouts.jpg

What do I need to grow them at home?

Tools and ingredients:

Directions:

  1. Start with a clean mason jar

  2. Add the seeds to the jar and add water to fill about 1/3 of the jar. Soak the seeds for approximately 12 hours with the jar standing straight up.

  3. Add the strainer lid, drain the water, add more water to rinse the seeds well, and drain again.

  4. Place the jar at a 45-degree angle in a well-ventilated place (I place it in a shallow bowl), ideally between 68°F and 72°F.

  5. Cover the jar with a kitchen towel

  6. Drain and rinse the sprouts every 6-12 hours. I aim to do it three times a day, morning, mid-day (when I am home), and evening. Strain well each time so little to no water is left in the jar.

  7. When sprouts reach 1 to 1 1/2 inches in length, place them in a large bowl of water. Gently swirl them so the seed shells separate and float to the top. Scoop up and discard the shells.

  8. Place a paper towel in the bottom of an airtight container, place the sprouts to the container, seal, and keep in the refrigerator for up to a week.


Important Note: After a day or two of sprouting you may notice some white, furry stuff on them that may even look like mold. It is most likely not mold, but cilia. These are microscopic hairs/cells that the roots of sprouts put out because they are thirsty. They are trying to get moisture that is trapped in air. We can see them because there are thousands of them. As you continue on in the process they go away.

Try them on soups, salads, toasts, sandwiches, pizza and more!

*Normally I am not a fan of plastic, but given that you are not heating the lid and that the mesh or metal lids have a tendency to rust, I like these lids the best for sprouting purposes.

Sources & Resources:

Melon, Basil & Feta Salad

Prep time: 20 minutes

Yield: 8-10 servings

Ingredients:

  • 4-5 cups seeded watermelon, cut into 1 inch pieces (about 1/2 a medium sized watermelon)

  • 2 English cucumbers, halved lengthwise, seeded, and sliced

  • 6 Green onions, chopped

  • 1/2 Cup fresh basil (mint works too!), chopped

  • 4-6 Ounces cubed or crumbled feta cheese

  • 1/3 Cup extra virgin olive oil

  • 1/4 Cup balsamic vinegar

  • Salt and pepper to taste

Stephanie_Selinger-32.jpg

Directions:

  1. In a large bowl combine the watermelon, cucumbers, onion, basil and feta.

  2. In a small bowl add the oil, salt, and pepper and whisk to combine

  3. Pour dressing over watermelon mixture and toss until coated.

Serve immediately or cover and refrigerate for up to 2 hours prior to serving. This salad is not the best the next day.

Yummy Chimichurri

Ingredients:

  • 1/4 Cup red wine vinegar

  • 1/2 Cup (packed) each of chopped cilantro, basil and parsley

  • 3 Garlic cloves

  • 1/2 Teaspoon pink salt

  • 1/2 Teaspoon cracked black pepper

  • 1/2 Teaspoon red pepper flakes (optional)

  • 1/2 cup Extra Virgin Olive Oil

chimichurri

Directions:

Add all ingredients except olive oil to a high powered blender. Cover and blend until relatively smooth. Keep blender running and add oil until combined. Store in glass container for up to 5 days or freeze for later use!

Chocolate Truffles

These are SO easy to make and very rich and yummy. They are refined sugar free, only sweetened with dates.

Makes 12-16
Ingredients:

  • 1/2 Cup organic cacao

  • 3 Tablespoons coconut oil

  • 2 Tablespoons nut butter of choice (no sugar added)

  • 1 Teaspoon vanilla extract

  • 2-3 Medjool dates (2 large or 3 small-medium), roughly chopped

  • 2 Pinches of Maldon or pink/sea salt

  • 6 Tablespoons chia seeds (optional)

Chocolate Truffles2.jpg

Directions:

  1. Place cacao, coconut oil, nut butter, vanilla extract, dates, and salt into base of a food processor.

  2. Process until smooth

  3. Pour chia seeds onto a plate or a shallow dish if using

  4. With hands form mixture into 12-16 balls (1/2-3/4 inches in diameter) and roll some or all into the chia seeds until covered (this part is optional). I use a teaspoon to scoop out a portion of the mixture to form into the ball.

  5. Chill in the refrigerator until ready to eat/serve

Instant Pot Beets

Instant pot beets are sooooo easy! If you love beets, but are turned off by cooking beets because it seems like a challenging task and you have an Instant Pot, be prepared to get cooking. I generally stick with the purple or chioggia beets because golden beets have a tendency to oxidize in the refrigerator once cooked, turning them a no so pretty black color over time. This is a weekly ingredient prep staple in my house. Beets are super nutrient dense, liver supportive and help our bodies to digest the fats we eat. If you like them (I know they are not for everyone), this is a great way to eat them regularly. Their greens are also really yummy braised or sautéed.

Ingredients:

1 large or 2-3 medium-sized purple beets, raw, whole and rinsed

beet

Directions:

Place whole raw beet directly into steamer basket (skin on) add one cup of water. Use the manual button for to cook for 15-20 min. I do 20 min for larger beets (maybe 25 if its a HUGE beet). Once cooled, they peel slides right off and you can chop. Eat immediately or store for a week in the fridge to add to salads or to eat on their own.

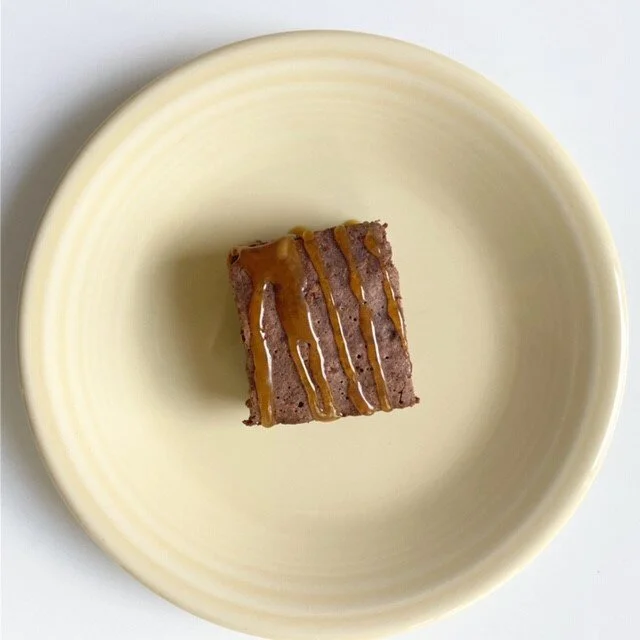
Fudgy Gluten-Free Brownies

Makes 9 squares

Ingredients:

  • 3/4 Cup chickpea flour (Bob’s Redmill is great)

  • 4 Tablespoons organic cacao powder

  • 2/3 Cup salted butter

  • 1/2 Cup semi-sweet or dark chocolate chips

  • 3 Large eggs

  • 1/2 Teaspoon salt (I love Redmond Real Salt!)

  • 2/3 Cup coconut sugar

  • 1 Teaspoon vanilla extract

brownie

Directions:

  1. Pre-heat oven to 350 degrees.

  2. Grease an 8x8 square dish.

  3. In a small saucepan add chocolate chips and butter and heat on low until butter and chocolate starts to melt. Stir to incorporate and set aside.

  4. In a large bowl, beat eggs and coconut sugar well for about 2 minutes

  5. Add the chocolate/butter mixture and vanilla and mix to incorporate

  6. Add salt, cacao powder, and chickpea flour and incorporate gently into wet mixture until just mixed

  7. Pour batter into baking dish and bake for 30-33 minutes. Let cool before slicing and eating!

Simple Homemade Tomato Soup

Serves 10-12 people

Prep/cook time: 10 minutes / 30 minutes

Ingredients:

  • 3 Tbsp extra-virgin olive oil

  • 2 Tbsp grass-fed butter

  • 2 Cups organic yellow onion, diced

  • 5 Organic garlic cloves, minced

  • 3 Tbsp organic tomato paste

  • 3 Cans organic whole tomatoes with juice (I like San Mariano)

  • 1 Tbsp dried organic oregano

  • Fresh basil leaves, chopped

  • Salt and pepper to taste

Tomatosoup

Directions:

Heat olive oil and butter in a large saucepan or Dutch oven over medium heat. Add onions, salt onions, cover and cook for 10 minutes. Add garlic, oregano, and tomato paste, saute for 2 additional minutes. Add canned tomatoes and the juice, breaking up the tomatoes with a wooden spoon. Bring to a low boil then reduce to a simmer for 20 minutes. Using an immersion blender, blend the soup soup directly in the pot (or blend in batches using a standard blender). Season with salt and pepper and serve with a garnish of chopped basil. It goes wonderfully with some crusty bread, croutons or grilled cheese sandwiches. It also freezes very nicely.

Reishi Hot Chocolate

Known by many as the “King of Mushrooms”, Reishi mushrooms are type of fungus native to several parts of Asia including China, Korea and Japan. They tend to be bitter-tasting with a tough texture which is why they are known more as a medicinal mushroom vs. a culinary mushroom. You are much more likely to find them in tincture or powder form.

Reishi mushrooms are considered by many to be adaptogenic, meaning they help your body deal with the negative effects of stress including inflammation, low energy, and hormonal imbalances. Studies have repeatedly shown that reishi mushrooms contain nutrients and antioxidants that strengthen the body’s defenses against cancer, autoimmune conditions, heart disease, allergies and more.

While generally considered very safe to consume it is always good to check with your doctor if you are unsure. Bio-individuality is key, as with any supplement or food. Consuming reishi can cause side effects for some so you definitely want to proceed with caution if you are pregnant, breast feeding, about to have surgery, have a blood disorder or high/low blood pressure.

The following recipe is one of my favorite treats for my whole family and is a great way to incorporate some reishi mushrooms into your diet. Even my daughter loves this hot chocolate!

Yield: 2- 3 Servings

Ingredients:

  • 3 Cups milk of choice (I like almond, coconut, hemp or flax)

  • 4 Teaspoons organic raw cacao powder

  • 1 Tablespoon reishi mushroom powder (I like Four Sigmatic)

  • 3 - 4 Tablespoons pure maple syrup

  • 2 Scoops grass-fed collagen powder (optional)


Hot Chocolate

Directions:

  1. Combine all ingredients into medium-sized saucepan and heat over medium heat. Whisk or stir to combine as it warms.

  2. Continue to whisk or stir until all of the cacao powder, reishi, and collagen dissolves into the hot chocolate. 

  3. Serve warm. Feel free to add marshmallows, cinnamon or whipped cream!

Sources:

Go-To Granola

Ingredients:

  • 2 cups raw, organic old fashioned rolled oats
  • 1 cup raw nuts, whole or chopped based on preference
  • 1/2 cup raw pumpkin seeds
  • ¾ cup shredded coconut
  • ½ cup unsweetened dried fruit, chopped (optional)
  • 2-3 tablespoons maple syrup 2 tablespoons virgin coconut oil or ghee (or a combo of both)
  • 1 teaspoon vanilla extract or almond extract
  • 1 large pinch coarse sea salt
Granola 2.jpg

Directions:

  1. Preheat oven to 325 degrees
  2. Combine all ingredients in a mixing bowl. Use your clean hands to mix well and toss to coat; don’t be afraid to get your hands dirty
  3. Spread the mixture in a thin layer on a baking sheet lined with parchment paper and bake for 20-30 minutes, stirring every 10 until toasted. Watch the granola carefully towards the end as it can burn quite easily.
  4. Cool before serving or storing.
  5. This granola can be kept in an airtight container in a cool, dry place for up to 2 weeks.

Enjoy!

Extra Mile Smoothie

This smoothie is inspired by the Extra Mile Smoothie at Kure in Portland, OR.  It is my favorite in town and I had to learn to make it myself, adapting it for the Healthy Balance smoothie formula. It's loaded with healthy fats, fiber and creamy goodness.  If you like coconut, you will be a fan of this one....

Ingredients:

  • 8 ounces coconut water 

  • 1 tbsp coconut manna (coconut butter) or coconut meat

  • 1 tbsp plain coconut yogurt (I love the Coyo brand)

  • 1 serving protein powder (I prefer collagen peptides)

  • 1 tbsp almond butter

  • 1 tbsp hemp seeds

  • 1 cup of kale, baby kale or baby spinach

Directions:

Blend all ingredients with one cup of ice. Garnish with coconut flakes, cinnamon or cacao nibs if you are feeling fancy!

Extra Mile.jpg

Round up: EASY Fermented Foods

Humans have prepared fermented foods and vegetables for many years, long before modern preservation methods like refrigeration came about. We know that fermented foods were a part of most, if not all native diets. While many cultures today still incorporate these foods into their diets regularly, in some parts of the world preparing ferments has become a lost practice.

Fermenting may seem daunting but it is actually really easy. If you are buying fermented foods regularly, you can save quite a bit of money by making them yourself. If you have yet to introduce fermented foods into your diet, what are you waiting for? Most of them taste really great (albeit a bit tangy!). There are some amazing health benefits to eating a diet rich in fermented foods:

  • Aids in digestion

  • Are loaded with beneficial enzymes, B-vitamins, omega-3 fatty acids, and probiotics

  • Supports your immune system

  • May help to curb sugar cravings

  • Promotes growth of healthy bacteria in the gut

  • Increases flavor of foods

Yogurt

Here are my best tips for success. Most of the recipes below go into some good detail to set you up properly as well:

Materials: glass and ceramic jars work the best. I like the classic glass Ball jars and use them for most everything I ferment. I have different sizes glasses depending on what I am fermenting. You may also want to invest in some supplies, Here are my favorite lids and weights.

Preparation: for vegetable ferments, clean your produce well of dirt and grime to ensure a successful fermentation process. Also, buy organic when possible to ensure that the produce has not come into contact with pesticides.  

When to stop: leave your ferment alone for the time suggested. Trust the process and only check on the ferment if absolutely necessary – like if you see mold. This is a risk for ferments, but it is easy to spot and deal with, usually. Black and bright pink are typically mold, while white is generally ok except when it is “fuzzy”.  Often times you can scrape off the mold and move on. If the mold is throughout the ferment its best to throw out and start over.

Here are my go-to, easy recipes:

Coconut Yogurt

https://minimalistbaker.com/easy-2-ingredient-coconut-yogurt/

Kimchi

https://www.thekitchn.com/how-to-make-easy-kimchi-at-home-189390

Saurkraut

https://www.ahealthybalance.net/recipes/2017/8/9/easy-saurkraut

Fermented Whole Radishes

https://www.mountainfeed.com/blogs/learn/fermented-whole-radishes

Quick Pickled Red Onion (not truly a ferment, but I love this recipe)

http://www.rickbayless.com/recipe/pickled-red-onions/

Fermented Salsa

https://wellnessmama.com/2643/fermented-salsa/

Fermented Beets with Cumin and Basil

https://thestingyvegan.com/spiralized-fermented-beets/

Fermented Pickles

https://www.farmhouseonboone.com/farmhouse-on-boone/the-easiest-way-to-make-homemade-pickles-from-all-those-extra-garden-cucumbers/

Salted Tahini Freezer Fudge

  • Ingredients

  • 1 Cup tahini

  • 4 Tablespoons cacao powder

  • 2 Scoops collagen peptides (optional)

  • 4 Tablespoons coconut oil, melted

  • 2-3 Tablespoons pure maple syrup

  • 1 Teaspoon vanilla extract

  • Coarse sea salt (or Redmond Real Salt) to taste

Salted Tahini Freezer Fudge 1.jpg


Directions

  1. Add all of the ingredients, except for the salt, into a bowl and mix well. I like to use a bowl with a spout or a large measuring cup so I can easily pour it into the molds.

  2. Pour the batter into small silicon molds or a parchment-lined 8x5 bread loaf pan, sprinkle with salt.

  3. Place pan or mold in the freezer for an hour or until solid.

  4. Remove the fudge and break fudge out of molds or cut into squares if needed.

  5. Store in freezer until ready to serve. Enjoy!